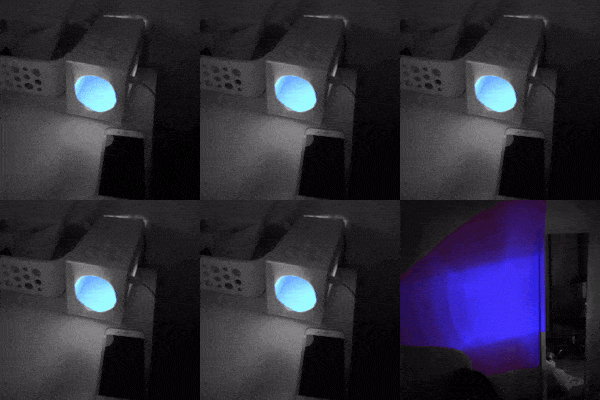
Lamp Design Project
The brief for this project was to 'design and prototype a lamp for a friend or family member.'
Target user
I chose to design a lamp for my 12-year-old sister Christine because she has many interests and hobbies which allowed me to have a wide starting point when brainstorming different ideas for a light source. As her older sister, I can confidently say that I know her from head to toe which gave me an advantage in creating something that’s more sympathetic to her.
Through the process of interviewing contextual inquiry and research, I was able to gain insight into Christine's life in which led us to design a projector.
Christine requested for a light source that would allow her to watch youtube videos without having to stare at her phone screen.

Design Statement
Christine Huang needs a light source for night time, which allows her to watch youtube and movies on her phone comfortably.
Visualisation Prototype
By conducting visual prototypes, I was able to quickly test my projector design as well as evaluating whether it answered Christine's needs and wants in a lamp. I was able to mitigate further risks by asking myself questions to prototype and successfully develop a visualisation prototype. I ended developing the second final ideation of a projector from gaining further feedback from Christine which demonstrated the importance of having a physical model for my stakeholder to interact with.
First visualisation sketch
Second visualisation sketch


Paper model prototype


> Building a physical prototype allowed me to evaluate the size, feel and aesthetic appeal of the projector. Despite the limited resources I was still able to produce a successful paper model made out of a tissue box, paper, glue stick, highlighter and a lamp. Through the evaluation process of direct observation was able to simulate experience as close up the real thing as possible. I made sure to undertake this evaluation at night and placed it directly on Christine's bedside table.
Specification Prototype
- The projector will be prototyped through the Ultimaker S5s printer in the fablab as it will be the most effective way to prototype a three-dimensional rectangle.
- Overall, Christine was very pleased with the specification prototype as she can now watch youtube and movies at night without her eyes having to strain.
- The led lights on the edges of the projector are sensor touch and are monitored through an Arduino. To simply turn on/off Christine will just have to tap the front face of the projector.
- Materials that will be needed include Asb filament, super glue, a magnifying glass, Arduino board, resistors, wire, led lights and aluminum foil


Strengths
- I was able to successfully design a lamp for a family member through the process of interviewing, ideating, research to thus develop a visualisation and specification prototype. Christine was needing a lamp for night time which would allow her to watch youtube and movies on her phone comfortably, therefore, we decided to design a projector.
- I was able to gain a thorough insight into Christine's life as I had direct access to feedback and the environment shew is living in. This allowed me to complete the visualisation prototype to a significant extent as I was able to physically test the size, feel and function of the projector design.
- Another significant strength I had was having my younger sister as my stakeholder as I already had a deep understanding of her likes/dislikes and hobbies. This allowed me to create a design that was more sympathetic and personalised to her.
Challenges/ Improvements
- A challenge I came was specification prototyping as I had never used any of the Softwares before such as Tinkercad or Fusion365. In particular, I felt very overwhelmed at first with fusion365 as it was nothing like had used before, all the functions and tools were completely foreign. However, things started making more sense after the tutorial with Jaime, and having to create a toothbrush really helped me to get familiar with the various tools available on fusion365. As a result, I was able to successfully develop a specification prototype of the projector.
- Another challenge I faced was not having direct access to the fabrication lab due and the teachers due to the situation of covid19 as this made it a bit more difficult to reach out for help. Although the teachers weren't available in person I found that the virtual office hours were extremely beneficial in solving any issues that I encountered. It was as simple as making an appointment on canvas to the day which suited me. Regardless of not having access to the tools and in-person feedback I was still able to develop a final product through other mediums.
- Overall, Christine and I are both very pleased with the final look, size, and usability of the projector however by adding a charging port inside the projector would further enhance its functionality. A factor that I didn't consider was that if Christine was watching a full-length movie the phone could potentially run out of power. However, this problem could be easily resolved with a build-in charger through solar power. The positioning of the projector on Christine's bedside table allows the sunlight to directly beam onto it during the day thus this would provide energy to the charging port.
